Knowing how to locate, discover and then classify files containing sensitive data is a critical part of adding context to your security, governance and data protection initiatives.
Knowing where sensitive data is located will help you determine whether you are applying the correct access controls, security solutions and protection initiatives on the data that matters most to the continuity and success of your business.
For example, if your organization secures healthcare records, or protected health information (PHI), then you are likely to be subject to a number of compliance standards – such as the Health Insurance Portability and Accountability Act (HIPAA) in the USA.
In the UK, if you store passport numbers of UK citizens then you are likely to be bound by GDPR compliance (and a few others).
These kind of security standards require you to be able to locate files containing sensitive data and apply the correct security and protection protocols. Failure to do this could result in large fines, damage to brand reputation, reparation costs and more.
There are native methods you can use to locate files containing sensitive data and classify them by type. Below is how to use File Server Resource Manager (FSRM) to locate files containing sensitive data:
Locate and Classify Files Using FSRM (File Server Resource Manager)
Step 1 – Creating a Rule to Find Sensitive Data
To use FSRM to locate files containing sensitive data, you will first need to create a rule to find the type of sensitive data that you are looking for.
- Go to “Server Manager” – “Tools” – “File Server Resource Manager” to open FSRM.
- In FSRM, go to “Classification Management” – “Classification Properties” – “Create Local Property”.
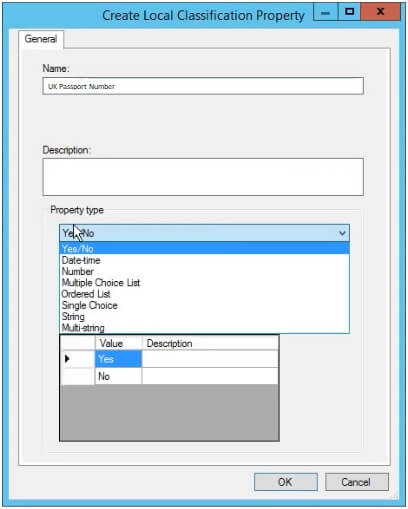
- Now you need to input the property “Name” and decide “Yes/No” for the “Properties Type”. Then click “Ok”. In this example, we’re going to name our property “UK Passport Numbers”.
- Now, go to “Classification Management” – “Classification Rules” – “Create Classification Rule”.

- Enter the “Rule Name” in the “General” tab.
- In the “Scope” tab, add a directory by clicking on “Add”. Then click “Ok”.
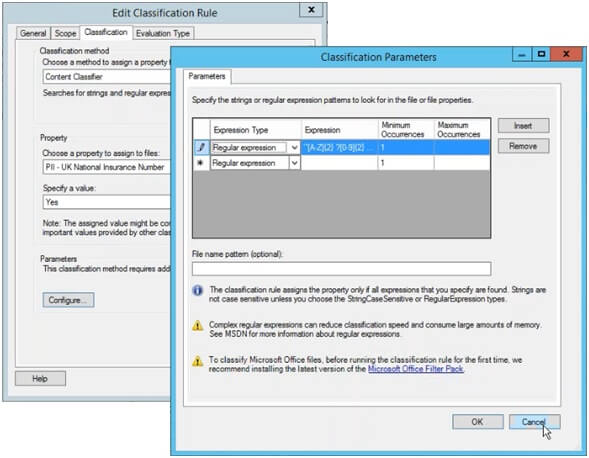
- Now, go to the “Classification” tab. From here, you can set “Classification Method” to “Content Classifier” and also set the “Property”. In this example we will set the property to the one we previously created – “UK Passport Numbers”.
- In “Parameters”, click “Configure” and choose “Regular Expression” as the “Expression Type”. Now you can enter the following regular expression for UK Passport Numbers: ^[0-9]{10}GBR[0-9]{7}[U,M,F]{1}[0-9]{9}$
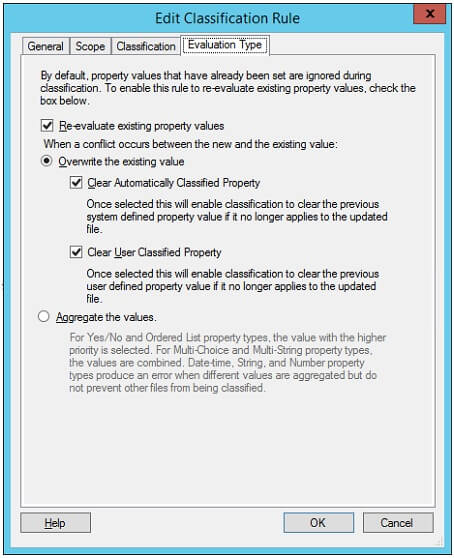
- After clicking “Ok” you now need to go to the “Evaluation Type” tab and select to enable the following:
- Re-Evaluate existing properties values.
- Overwrite the existing values.
- Clear Automatically Classified Properties.
- Clear User Classified Properties.
- Now click “Ok”.
Step 2 – Execute the Rule You Have Created
- Open FSRM and right click on “Classification Rules” – then click “Run Classification with All Rules Now”.
- In the “Run Classification” section, you can select to run the classification in the background.
Step 3 – Configure Classification Schedule
If you want to ensure that you are continually locating files containing sensitive data, you need to make sure the scan runs on a regular basis. To do this:
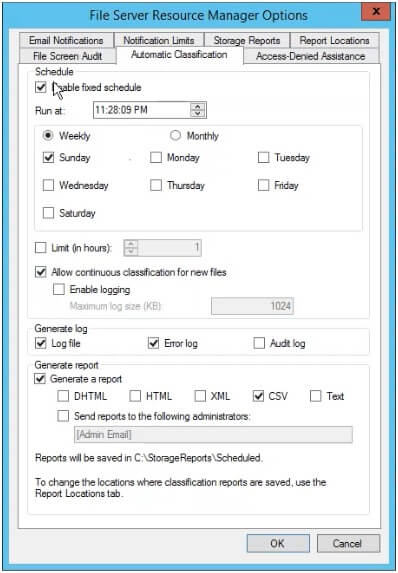
- Go to FSRM and click on “Classification Rules” – “Run Configure Classification Schedule”.
- Go to the “Automatic Classification” tab and select the schedule you wish to run the report on. You can select to “Enable fixed schedule” and choose the time, frequency and format of the report.
Step 4 – Test and Expand
Ensure that you test to make sure the classification rules are working as desired and that sensitive files are being located and correctly classified. View the reports being delivered on a schedule to ensure they are to your liking.
Once you are happy, you can go ahead and add more regular expressions to build out your classification abilities. Common regular expressions can be found easily online.
How to Use Lepide to Locate and Classify Files Containing Sensitive Data
As we can see from above, using FSRM to locate and classify sensitive data is a very manual process that is error prone and time consuming. It’s difficult to get meaningful reports delivered and the scans can take a long time. It is also limited to data stored on Windows file servers and you can’t search for sensitive data.
So, is there a better way?
There certainly is.
Lepide Data Security Platform allows you to easily locate and classify sensitive data through their inbuilt data classification engine. The solution located sensitive data and classifies it at the point of creation/modification in real time to threat detection and response times. Data can also be classified based on the risk and monetary value associated with it.
Lepide can discover and classify data from numerous sources and produces contextual reports in real time or at the click of a button.
After configuring your data stores, classification server and selecting “On the Fly Classification” you are now ready to run the scan. The solution contains hundreds of pre-defined regular expressions and also allows you to input your own custom ones should you wish.
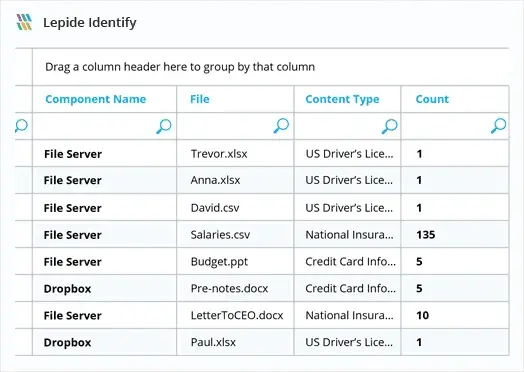
After the initial scan has completed, you will now have proactive, continuous data classification running. Below is an example of a report of sensitive data by file type:
