In Microsoft Windows, Group Policy Object (GPO) controls the network by providing an integrated platform for the management and configuration of operating systems, applications, and user settings in the Active Directory environment. Group Policy settings are stored in Group Policy Objects which can be associated with Sites, Domains, and Organizational Units.
In large organizations, there can often be more than one administrator who takes care of the network through the Group Policy Management Console (GPMC). It’s important to audit Group Policy changes in order to determine the details of changes made to Group Policies by delegated users.
Group Policy Objects are stored in two different places: “Group Policy Template” and “Group Policy Container.” The Group Policy Templates are stored in the “%sysroot%\SYSVOL” folder. To monitor Group Policy changes, administrators must enable Group Policy change auditing and SYSVOL folder auditing. To monitor Group Policy changes completely, you must enable the auditing of DS Objects, Group Policy Container Objects, and SYSVOL folder.
Step 1 – Configuring DS Objects and File System auditing
You must follow the below steps to enable Directory Service Objects auditing:
- Go to Start Menu -> Administrative Tools.
- Launch “Group Policy Management Console”.
- Go to Forest -> Domains -> Domain Controllers.
- Next, you will have to right-click on the “Default Domain Controllers Policy”. From the context menu, click on “Edit” to open the “Group Policy Management Editor” window.
- After the editor window opens up, go to “Computer Configuration” -> “Policies” -> “Windows Settings” -> “Security Settings” -> “Advanced Audit Policy Configuration” -> “Audit Policies”.
- In the “Audit Policies”, click on “DS Access”. The following policies will be displayed:
- Audit Directory Service Access
- Audit Directory Service Changes
- Audit Directory Service Replication
- Audit Detailed Directory Service Replication
- For each of these policies, you will have to double-click on them one by one and enable both “Success” and “Failure” auditing.
- In order to enable the auditing of “Object Access” -> “Audit File System” in “Advanced Audit Policy Configuration”, follow the same steps.
Step 2 – Configuring Group Policy Container Objects auditing
Perform the following steps to enable Group Policy Container Objects auditing:
- Launch the ADSIEdit.msc (Active Directory® Service Interfaces Editor).
- Go to the left pane and right-click on the root “ADSI Edit”. Select “Connect to” option from the context menu. Connect to the current domain controller (DC), which appears with “Default Naming Context”.
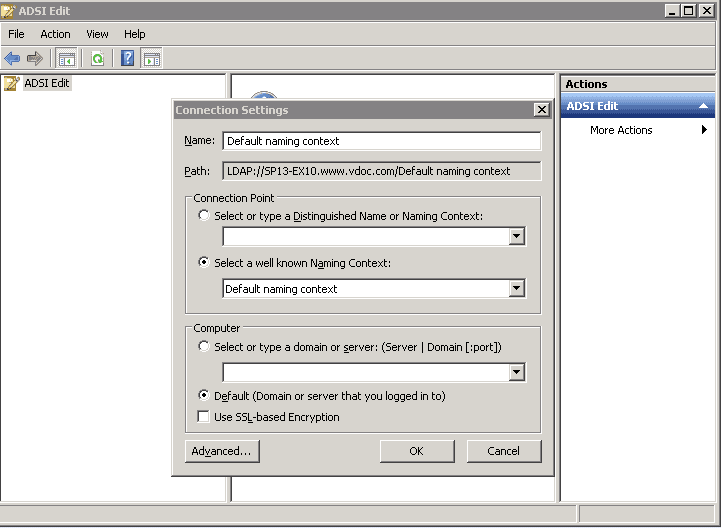
Figure 1: Connection Settings - Click “OK” to connect.
- In the left panel, a tree will appear. Double click on the node of “Default naming Context” and go to “DC=www,DC=domain,DC=com” -> “CN=System” -> “CN=Policies”.
- Right click on the “CN=Policies” and navigate to Properties.
- Go to “Security” tab and click on “Advanced” button to access its Advanced Security Settings.
- Navigate to “Auditing” tab in the Advanced Security Settings.
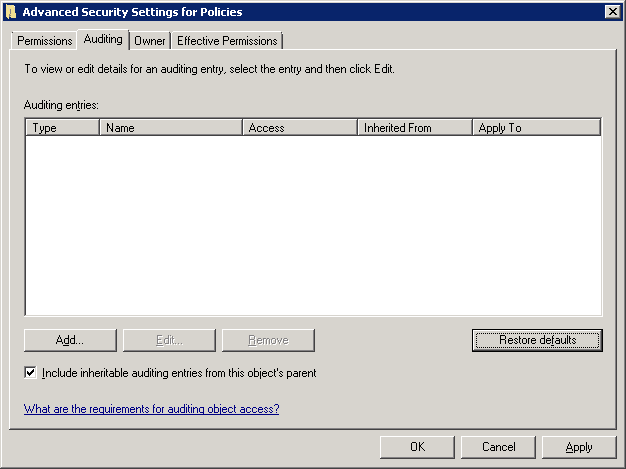
Figure 2: Navigate to auditing tab - Use the “Add” button to add the user for whom the auditing has to be enabled. The following window appears.
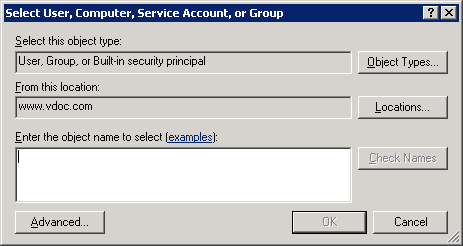
Figure 3: Add user - Enter name of the user for which you want to enable the auditing. You can also type “Everyone” to audit all users’ changes.
- Click “Check Names” to confirm the username.
- Click on “OK” to add the user. “Auditing Entry for Policies” dialog box appears
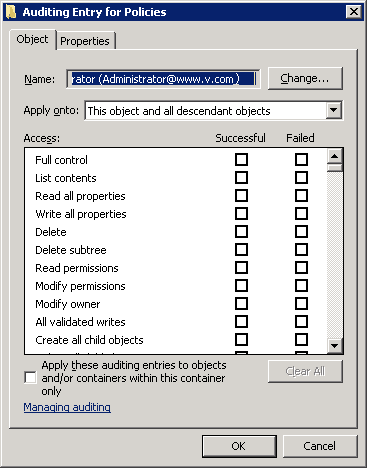
Figure 4: Select the audit entries - Choose the entries for which the user’s action will be audited. Select “Full Control” for auditing both “successful” and “failed” events.
- Select the “Apply these auditing entries to objects and/or containers within this container only” checkbox to apply the changes to the child objects as well.
- Click on “OK” to apply these auditing entries. “Auditing” tab of Advanced Security Settings will appear.
- Click “Apply” and “OK” to apply the auditing settings
Step 3 – Configuring SYSVOL folder auditing
Perform the following steps to enable SYSVOL folder auditing where the Group Policy Templates are stored:
- In the Windows Explorer, browse the %systemroot% folder.
- Go to the “SYSVOL” folder, and right-click on it. Click on “Properties”.
- Navigate to the “Security” tab and click “Advanced”. The “Advanced Security Settings” for SYSVOL folder will be displayed.
- Navigate to “Auditing” tab, and click on the “Edit” button. The following auditing settings will be displayed.
- Click on “Add” button to add the user for which the auditing has to be enabled.
- Choose the auditing entries.
- You can also choose to audit the files and sub-folders as well.
- Click “OK” to complete the process
Step 4 – Viewing the Result in Event Viewer
After the above auditing setting has been applied, every change in the GPO will be tracked and viewed from the Event Viewer. Follow the below steps to view events in Event Viewer:
- Go to Start ➔ Type “Event Viewer” and click enter to open the “Event Viewer” window.
- In the left navigation pane of “Event Viewer”, open “Security” logs in “Windows Logs”.
- You will have to look for the following event IDs:
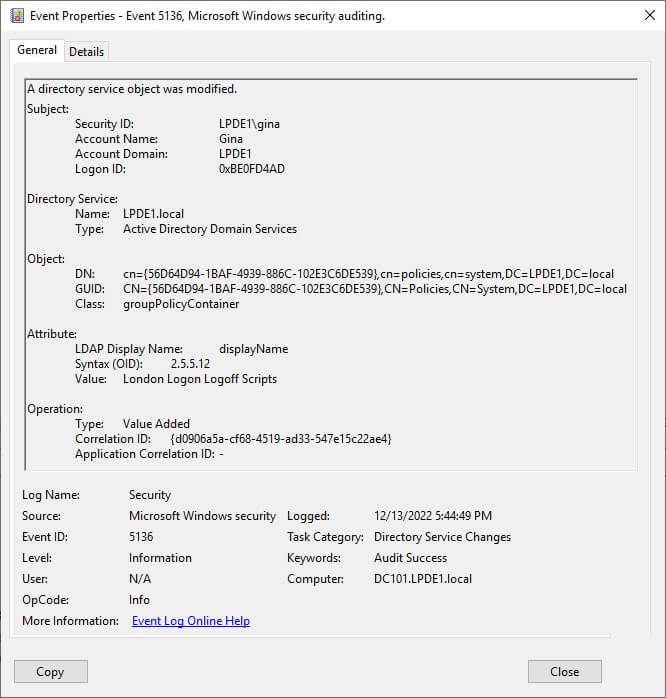
- The following image for the event ID 5136 shows the GPO modification event with all the necessary information.
However, using the Event Viewer to obtain information about every GPO event is a laborious and time consume way of doing things. Lepide Auditor provides an easy alternative for Group Policy auditing.
How Lepide Helps with Group Policy Auditing
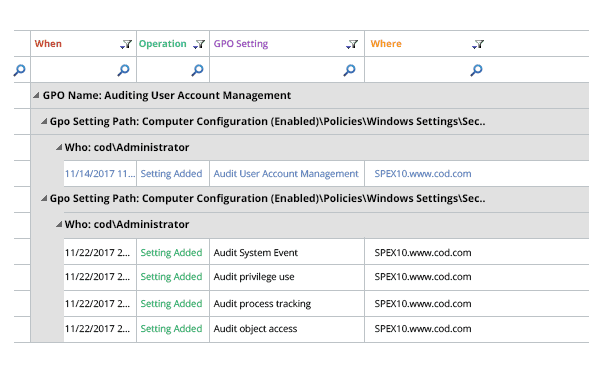
Lepide Group Policy Auditor is a solution to the problems associated with native Group Policy auditing. Simply install the solution and add domain to it. Then, in real-time, audit reports will be generated to show which Group Policy was changed, when, where and by whom. Before and after values for each change are displayed in the same place. A live feed of changes is shown at the application’s interface. Lepide GPO Auditor will send real-time alerts and scheduled reports on important changes to any specified recipients. The following image shows a GPO modification event captured by Lepide Group Policy Auditor:
