With many organizations hosting their critical data on SharePoint sites, it is crucial that attention must be given to the security of the information contained in them. There is always a risk of users misusing or manipulating sensitive data assets (be it intentionally or accidentally). Identifying these changes promptly helps in instigating measures to protect them. This article sheds some light on the steps required to track changes in SharePoint both natively and using Lepide SharePoint Auditor. Let’s begin with the native method.
Audit Changes made to SharePoint with Native Auditing
Please follow below steps for native auditing:
Step 1: Enable Audit Log Feature in Central Administration Site
- Go to “Application Management” section, click “Manage service applications” under “Service Applications” on the right-pane.
- Select “Secure Store Service Application” from the list. On the ribbon, click “Properties”.
- In the “Edit Secure Store Service Application” page,scroll down to enable the audit section.
- In “Enable Audit section”, click to select “Audit log enabled” and set “Days Until Purge” as 30 (the default value is 30 days).
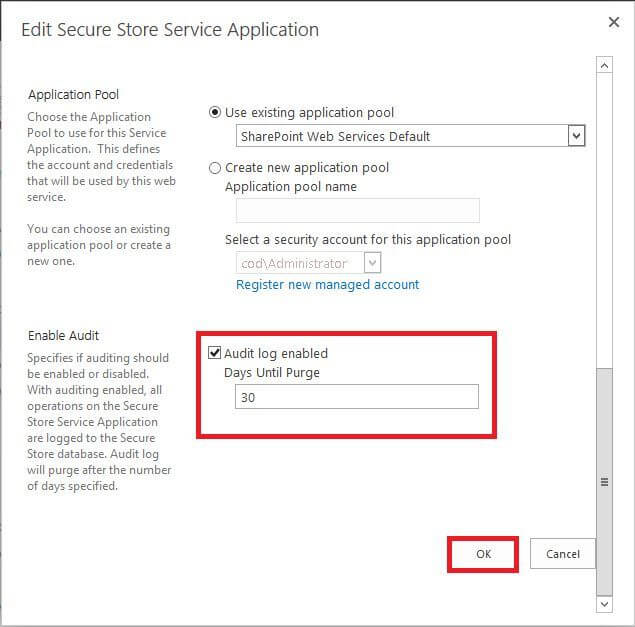
Figure 1: Enable the audit section - To save the changes, click “OK”.
- Click “OK” on the confirmation message on the screen.

Figure 2: Confirmation message
Step 2: Enable auditing at Site Collection level
Follow the steps given below to configure the audit settings:
- Click Gear icon on the top right of the homepage and then click “Site Settings”.
- Now under “Site Collection Administration”,click “Site collection audit settings”.
- In “Configure Audit Settings” page, select the check boxes to specify the events that you want to be audited.
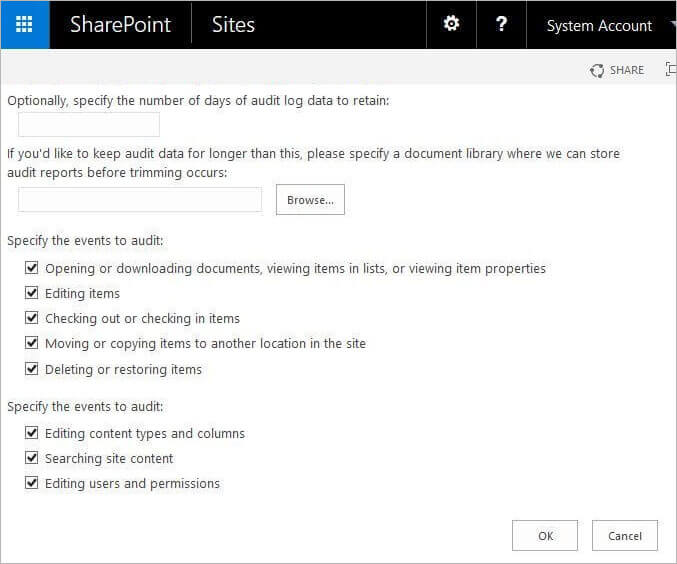
Figure 3: Configure Audit Settings page - Click “OK” to save the changes.
Step 3: View Audit Log Reports
After the audit functionality is enabled, data will be automatically logged. You can filter and analyze the audit data for sites, lists, libraries, list items, content types, and much more. To view the audit reports:
- Click “Audit log reports” link under “Site Collection Administration”.
- In “View Auditing Reports” page, pick up the relevant report. You will see different reports.
- After selecting the required report, browse the location where you would like to save the excel spreadsheet to view the report.
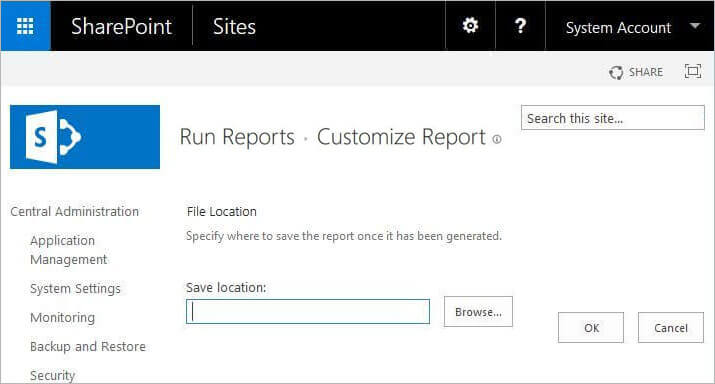
Figure 4: Browse the location to save the report The following is a report showing site content modifications in an excel sheet using native method.
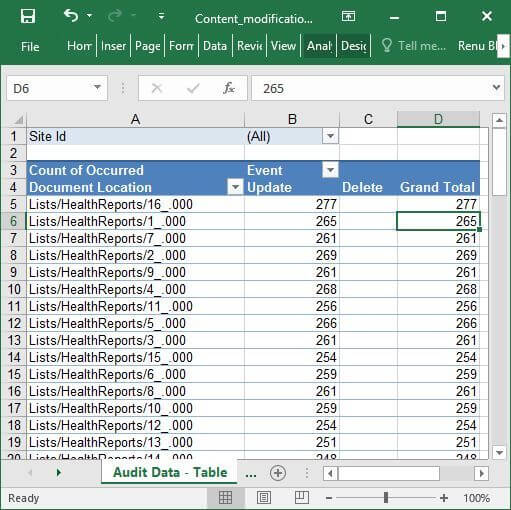
Figure 5: Site content modifications report
Issues with Native Auditing of SharePoint Server
You can see that the site content modifications report shown above does not explicitly specify the exact changes made to the site contents. When using the inbuilt mechanisms to audit SharePoint, one has to devote a considerable amount of time to derive anything meaningful. You will have to enable audit logging, configure the audit settings and then extract details from the log reports. This process is quite time-consuming and is often a daunting task for admins.
How Lepide SharePoint Auditor Helps in Auditing Changes
Lepide SharePoint Auditor is a comprehensive auditing solution that tracks and monitors security, configuration and data level changes made to both SharePoint on-premise and online. Our cutting-edge auditing solution enables you to store data in a centralized and secure database.
The following is a screenshot of the “All SharePoint Modifications Reports” generated by Lepide SharePoint Auditor with granular details like who made what changes to which object and when.
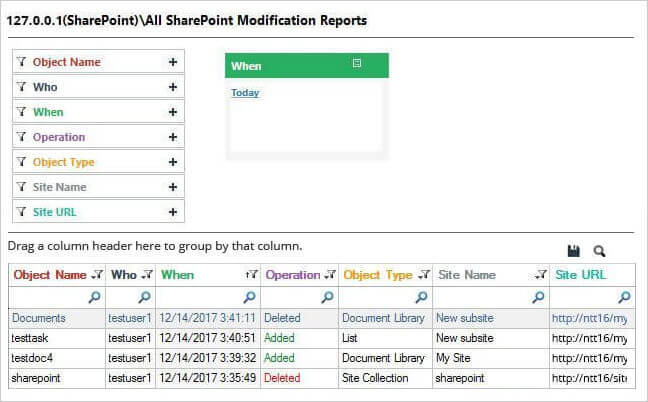
With a fast and simple way to audit SharePoint, Administrators are no longer required to spend hours collecting and organizing data from unmanageable logs. The predefined audit reports by Lepide’s SharePoint auditing tool make it easy to determine who, where, what and when a change was made.

