How to Track Who Enabled a User in Active Directory
How to Track Who Enabled a User in Active Directory
Find Who Enabled a User in Active Directory with Lepide Auditor
Fill in the rest of the form to download the 20-day free trial
x
One of the most challenging tasks Administrators face on a day-to-day basis is simply managing user accounts in Active Directory. In any network environment, unauthorized access to user accounts can lead to the exposure of confidential data. In your organization, you may have numerous user accounts that have been disabled or locked out to prevent that person from accessing the IT environment. Some accounts, such as temporary user accounts, need to be disabled, either automatically or manually, when they are no longer needed. If one of these disabled accounts suddenly re-gains access, it can be a potential threat to your IT security. So, keeping track of all recently enabled accounts in your organization’s network helps keep your critical data secure. In this article, we will discuss the steps you need to take in order to detect who enabled a user account in Active Directory.
Track Who Enabled a User in Active Directory with Native Auditing
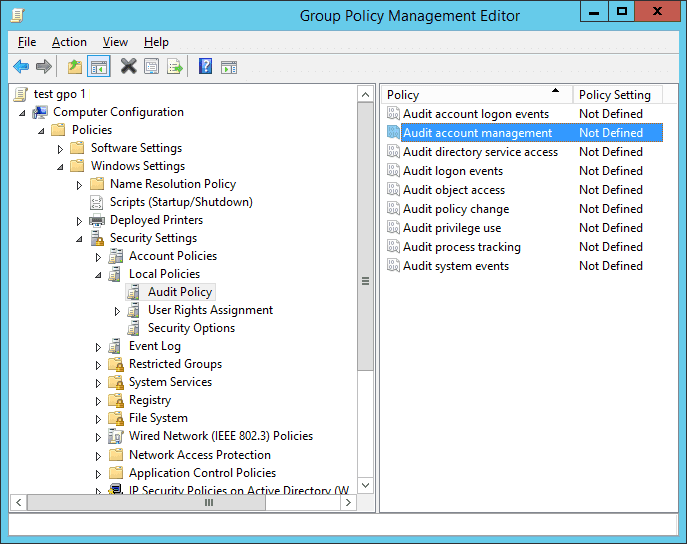
Step 1: Apply the Group Policy
Firstly run “gpedit.msc” command in “Run” box or “Command Prompt” to open the Group Policy Management Console.
Edit the default domain policy or customized domain wide policy. We recommend you create a new GPO, link it to the domain and edit it from there. You can link a new GPO from the domain by right clicking on it.
Right-click the default or newly created GPO and click “Edit”. “Group Policy Management Editor” appears on the screen.
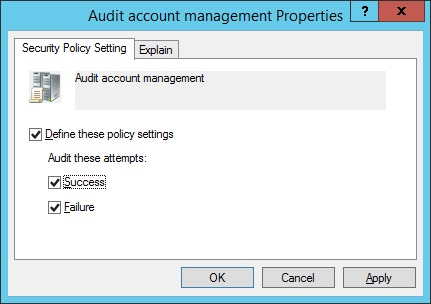
Double-click “Audit Account Management” Policy. Select the “Define these policy settings” option.
Select both “Success” and “Failure”.
Figure : Enable Audit Policy
Click “Apply” and “OK”.
Step 2: Force a Group Policy update
In “Group Policy Management” right-click the defined OU and then select “Group Policy Update.” Alternatively, you can run the following command on the command prompt:
gpupdate /force
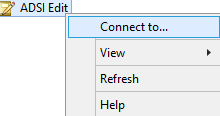
Step 3: Enable auditing using ADSI
In the “Run” box, type “ADSIEdit.msc” and press “Enter” key to open its console.
Right-click “ADSI Edit”, the top node in left panel.
Figure : Right-click on root node
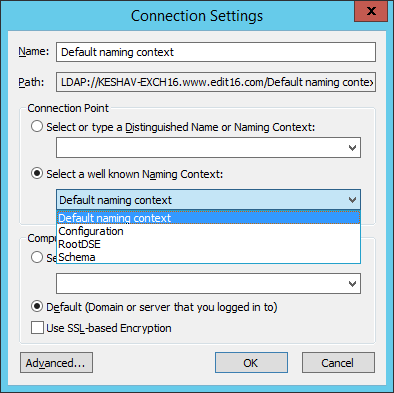
In the context menu, click “Conenct to” to open “Connection Settings” window. Here, click “Select a well-known Naming Context”.
In the drop-down menu, click “Default Naming Context”
Figure : “Connection Settings” window
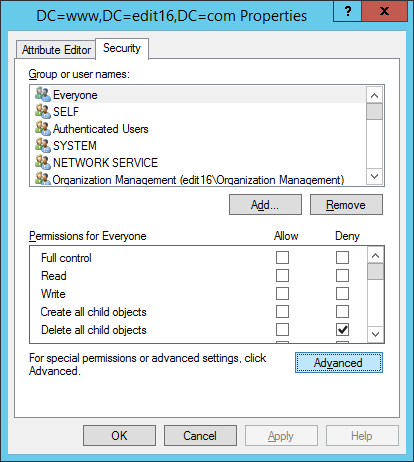
Right-click the “Domain DNS object” and click “Properties”.
Switch to the “Security” tab
Figure : Security tab in Properties
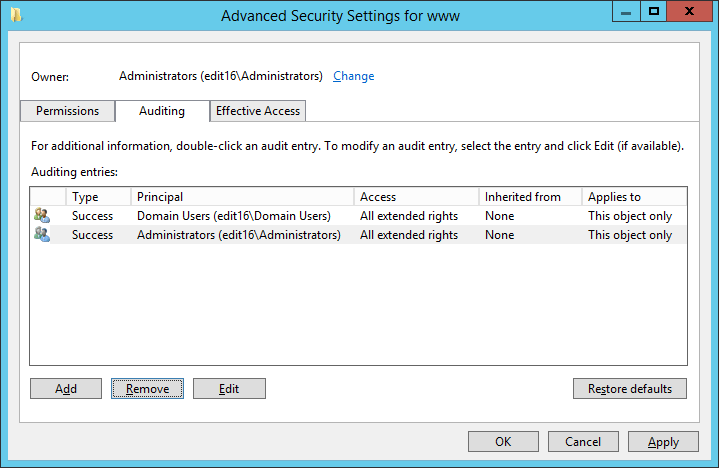
Click “Advanced” to access “Advanced Security Settings”.
Switch to the “Auditing” tab.
Figure : Advanced Security Settings window
Click “Add” to add an auditing entry.
Click “Select a Principal” and add “Everyone”. (You can also add any specific user, computer, group or service account.)
Figure : Auditing Entries
Now, select “All” in “Types” drop-down menu.
Select “This object and all descendent objects” in “Applies to” drop-down menu.
Click checkboxes to select all permissions except the following:
Full control
List contents
Read all Properties
Read permissions
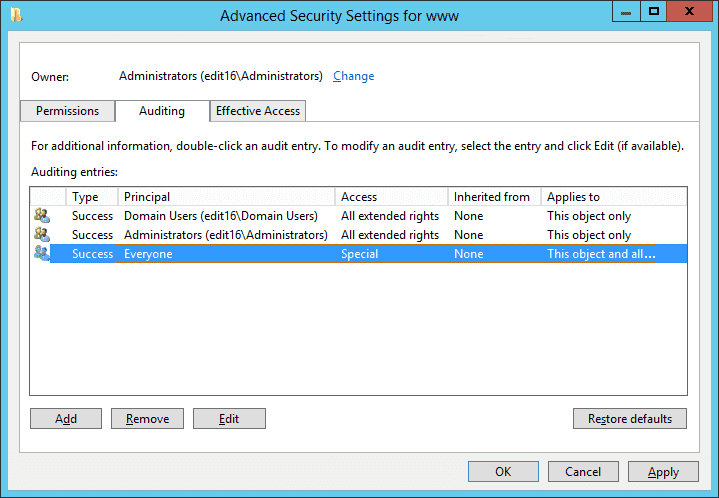
Click “OK”. The auditing entry of these permissions for “Everyone” are displayed in the “Auditing” Tab of “Advanced Security Settings”.
Figure : Advanced Security Settings Window after adding “Everyone”
Click “Apply” and “OK” to close the “Auditing Entry” window. It takes you back to the “Security” Tab for object properties.
Click “Apply” and “OK” to close object properties.
Close the “ADSIEdit” window.
Step 4: Open Event Viewer
Perform the following steps to view the change event in Event Viewer:
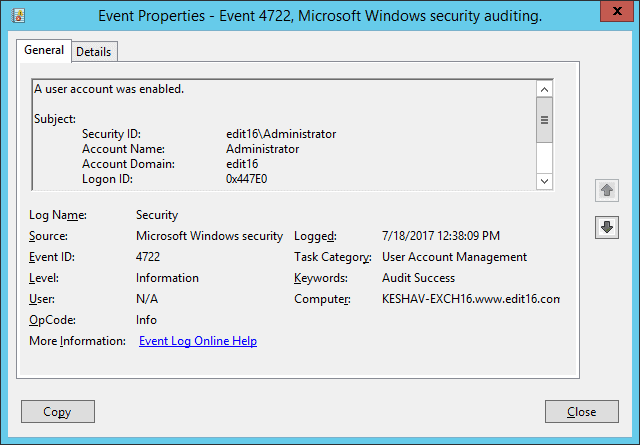
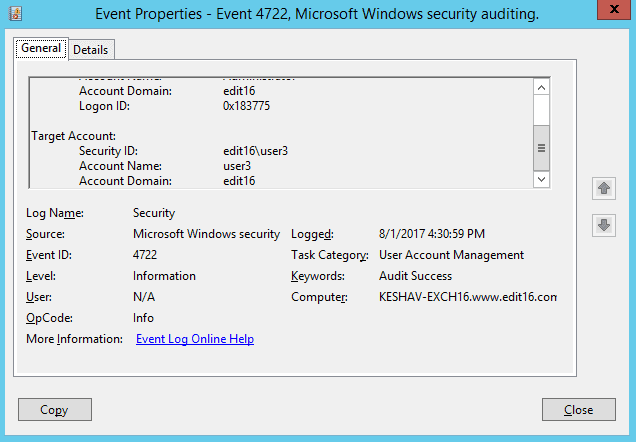
Start “Event Viewer” and search for the event ID 4722 in the Security Logs. This ID identifies a user account that was enabled.
Figure: Event Properties
The above image displays the user who enabled a user account. You can scroll down to view which user has been enabled.
Figure : Event Properties with target account details
How Lepide Active Directory Auditor Tracks Changes in AD
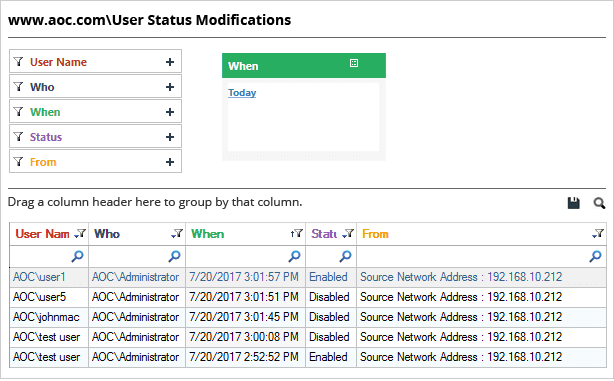
Want a quicker, simpler and (in all honesty) better way of detecting when changes are being made to user accounts? Lepide Active Director Auditor(part of Lepide Data Security Platform) can provide you with this level of in-depth visibility with real-time alerts that help you overcome the limitations of native auditing. The following image shows the level of detail this solution provides, including who, when and where details of the modified accounts which can be easily sorted and filtered.
Figure: User Status Modifications Report
Conclusion
This article should give you an idea about two very different ways by which you can track changes made to user accounts in Active Directory. Hopefully, you should be able to see that the native auditing method is fairly cumbersome and time-consuming. Lepide’s Active Directory auditing solution, however, is a simple and user-friendly auditing solution, marketed at an affordable price for businesses of all sizes, sectors and budgets.
Find Who Enabled a User in Active Directory with Lepide Auditor
Fill in the rest of the form to download the 20-day free trial